Body
This is a guide to set up a new iPhone, and if necessary, transfer data from, and decommission your old phone.
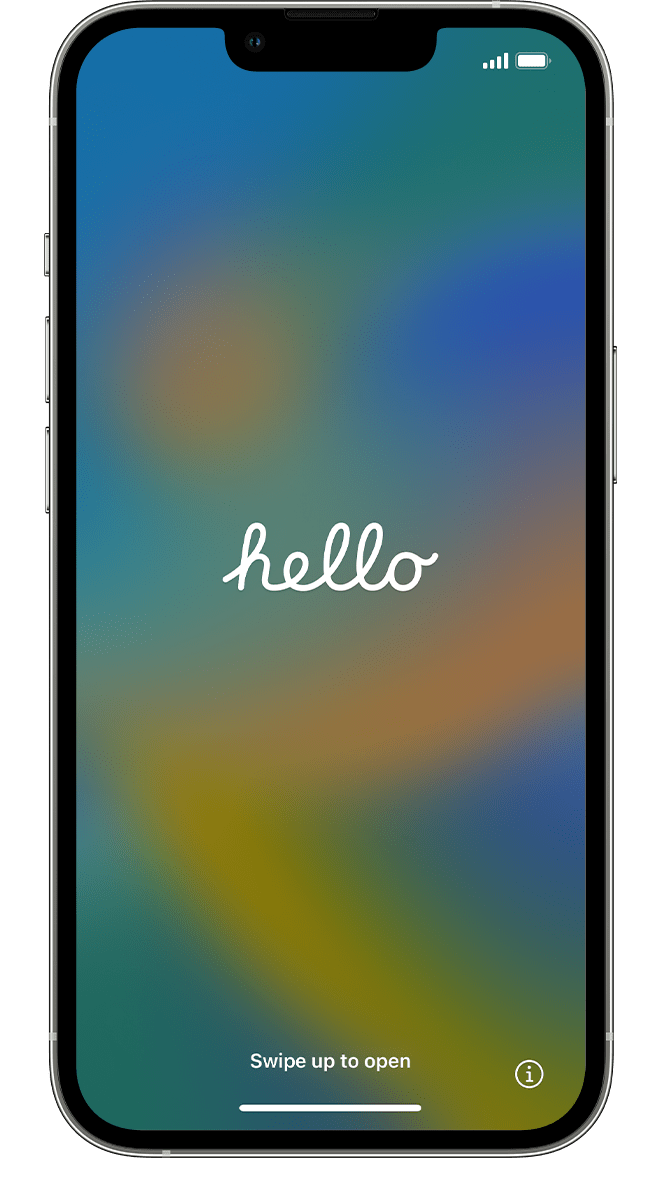
Turn on your iPhone
Press and hold the device's power button until you see the Apple logo. You'll then see "Hello" in many languages. Follow the onscreen instructions to get started.
If you're blind or have low vision, you can turn on VoiceOver or Zoom from the Hello screen.
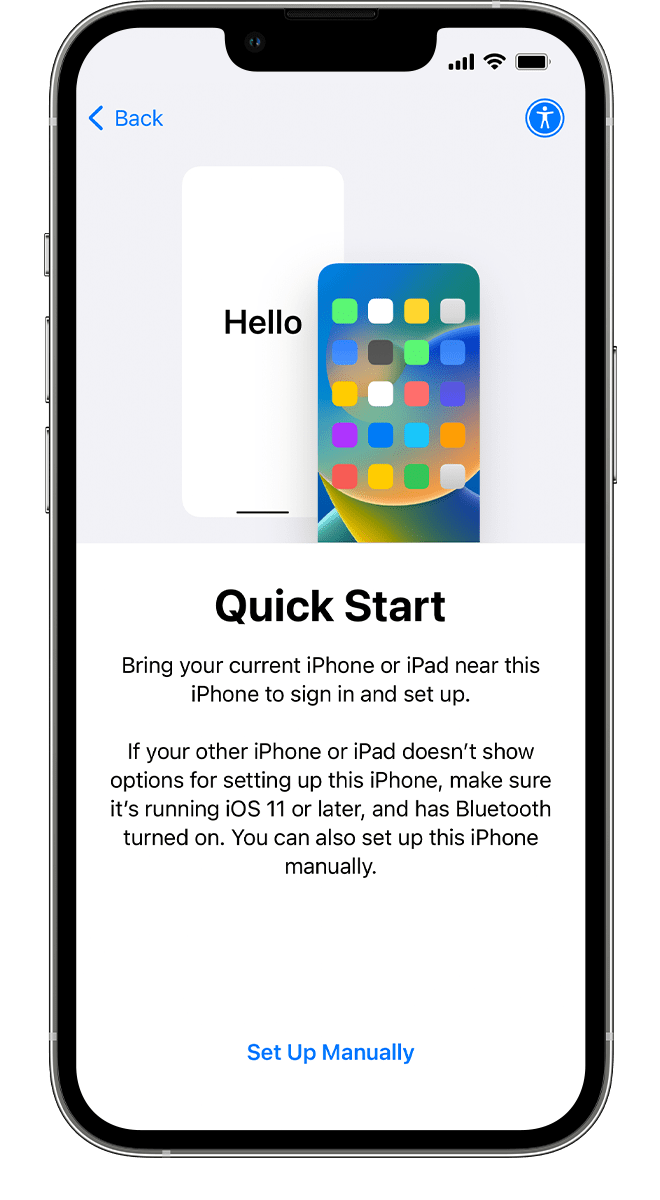
Use Quick Start or set up manually
If you have another device, you can use it to automatically set up your new device with Quick Start.
If you don't have another device, tap Set Up Manually.
Here you can tap the blue accessibility button to set up Accessibility Options.
Activate your iPhone
You need to connect to a Wi-Fi network or a cellular network to activate and continue setting up your device.
Tap the Wi-Fi network that you want to use or, if available, tap Continue Without Wi-Fi to use your device's cellular network. If you're setting up an iPhone or iPad (Wi-Fi + Cellular), you might need to insert your iPhone SIM card or iPad SIM card first. You might also be asked to activate your eSIM.
Get help if you can't connect to Wi-Fi or if you can't activate your iPhone.
Automated Device Enrollment (Towson U owned Mobile Devices Only)
If your Mobile Device is owned by Towson University, you will see the following screen. You can tap Next to continue

Set up Face ID or Touch ID and create a passcode
Follow the onscreen instructions to set up Face ID or Touch ID to use face recognition or your fingerprint to unlock your device and make purchases.
Next, set a six-digit passcode to help protect your data. You need a passcode to use features like Face ID, Touch ID, and Apple Pay.
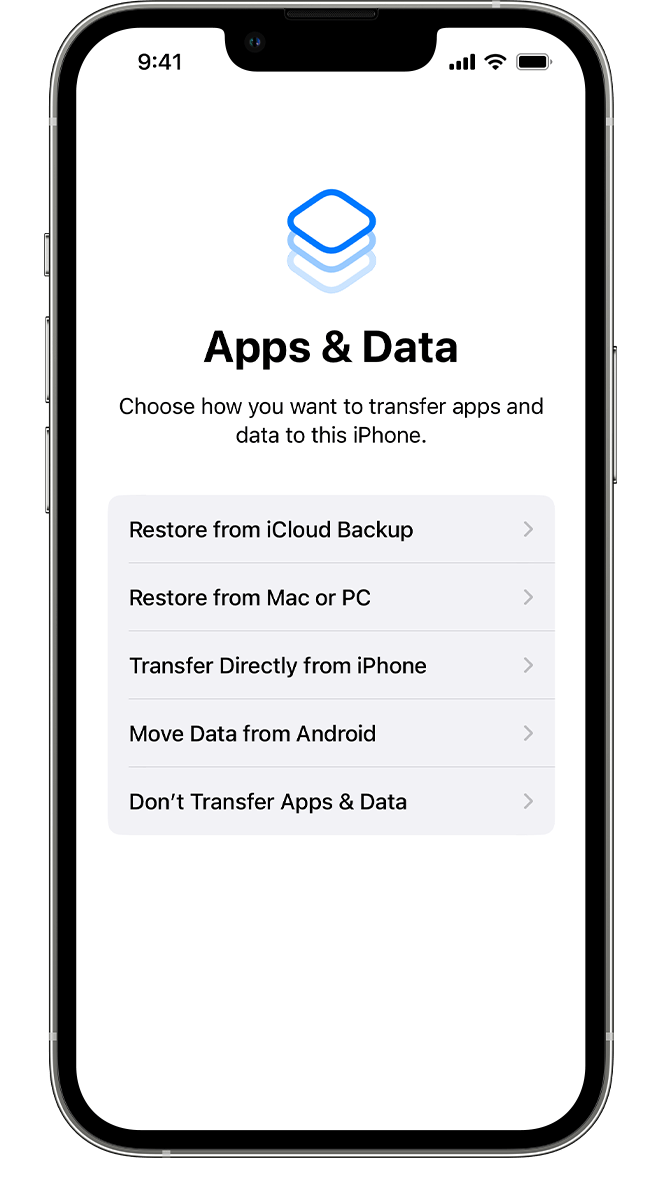
Restore or transfer your data and apps
Choose how you want to restore or transfer your data from your old device to your new device. You can use an iCloud backup or a backup made from your computer, or move data from an Android device.
If you don't have a backup or another device, select Don't Transfer Apps & Data.
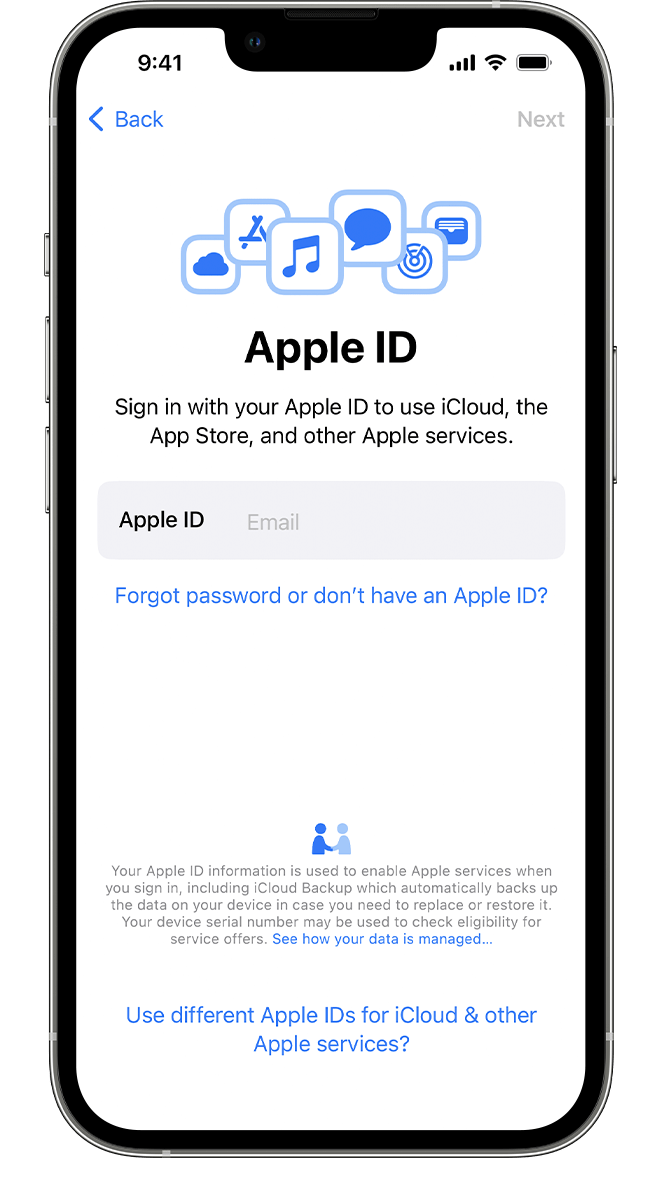
Sign in with your Apple ID
Enter your Apple ID and password, or tap "Forgot password or don't have an Apple ID?" From there, you can recover your Apple ID or password, create an Apple ID, or set it up later.
If you use more than one Apple ID, tap "Use different Apple IDs for iCloud and iTunes?"
When you sign in with your Apple ID, you might be prompted for a verification code from your previous device.
Turn on automatic updates and set up other features
Follow the onscreen instructions to allow iOS or iPadOS to update automatically and set up other features, like iMessage, FaceTime, Location Services, and Analytics.
Set up Siri and other services
Next, you'll be asked to set up or enable services and features, like Siri. On some devices, you'll be asked to speak a few phrases so that Siri can get to know your voice.
If you signed in with your Apple ID, follow the steps to set up Apple Pay and iCloud Keychain.
Set up Screen Time and more display options
Follow the onscreen instructions to set up Screen Time, which gives you insight into how much time you and your kids spend on your devices. It also lets you set time limits for daily app use.
You can also turn on True Tone, if your device supports it, and use Display Zoom to adjust the size of icons and text on your Home Screen.
Set up Other Apps & Services as Needed
Here are other recommended apps that you may wish to install.
- Duo - The Duo App is the most convenient, and reliable way to use Duo. It will work even when you don't have a cellular or WiFi signal.
- Outlook or iOS email app
- Set up WiFi Calling - Allows you to make and receive phone calls using WiFi while not receiving a cellular signal.
- Set up Webex, and/or Zoom
- Set up Safer Mobility (can contact TUPD with video call and location sharing)
- Windows App (for Virtual Workspace)
- TU Tiger Ride (on campus bus schedules)
- TU Campus Rec
- TU Tigers App - TU Athletics
- Blackboard
- Solstice (for connecting to Solstice Pods in campus classrooms, and conference rooms)
- OneDrive, Word, Excel, OneNote, PowerPoint, To Do
- LinkedIn Learning - Provides online video-based instruction to faculty, staff, & students
Erase & Retire Old Phone